I happened to test out ARO 4 with Azure Active Directory integration. The Azure documentation is good, but I had to change a few while testing the steps. I am sharing my experience here and hope someone will find it useful.
Setting the requirements
Install or update Azure CLI
brew update && brew install azure-cliMake sure you have permission to create resources in the resource group. I logged in as a global administrator when I am testing this.
Setup the environment variables
$ cat aro-env
LOCATION=centralus. # the location of your cluster
RESOURCEGROUP=aro-rg # the name of the resource group where you want to create your cluster
CLUSTER=poc #cluster-id of the ARO 4 cluster
$ source aro-env
Log in Azure
az login
Create a Resource Group
az group create \
--name $RESOURCEGROUP \
--location $LOCATION
Add DNS zone
If you don’t have a DNS zone already, you can use this step.- Login Azure Portal
- Type: “DNS Zones” in the search box on the top and click on “DNS Zones”
- Click “+Add” on the top
- Select the newly created resource group
- Enter your domain
- Select the location
- Create “Review+Create”
Notes:
- I am using a domain name outside of the Azure. You will need to add the NS records from the overview page of the DNS zone to your domain.
- Request increase of quota from Azure portal. ARO requires a minimum of 40 cores.
Register Resource Provider
az account set --subscription
az provider register -n Microsoft.RedHatOpenShift --wait
az provider register -n Microsoft.Compute --wait
az provider register -n Microsoft.Storage --wait
Create a Virtual Network
az network vnet create \
--resource-group $RESOURCEGROUP \
--name aro-vnet \
--address-prefixes 10.0.0.0/22
Create an empty subnet for master nodes
az network vnet subnet create \
--resource-group $RESOURCEGROUP \
--vnet-name aro-vnet \
--name master-subnet \
--address-prefixes 10.0.0.0/23 \
--service-endpoints Microsoft.ContainerRegistry
Create an empty subnet for worker nodes
az network vnet subnet create \
--resource-group $RESOURCEGROUP \
--vnet-name aro-vnet \
--name worker-subnet \
--address-prefixes 10.0.2.0/23 \
--service-endpoints Microsoft.ContainerRegistry
Disable private endpoint policy
az network vnet subnet update \
--name master-subnet \
--resource-group $RESOURCEGROUP \
--vnet-name aro-vnet \
--disable-private-link-service-network-policies true
Once the above steps are done. You don’t have to redo the steps if you are going to reuse the names and resources.
Create Cluster
Please make sure you log in to Azure and environment variables are set.
Information that we need for creating a cluster
- Get a copy of the pull secret from cloud.redhat.com. If you don’t have a user name created, please just register as a user for free.
- Create an ARO cluster using the following command. Please apply to appropriate values.
Some values were used in the example are explained as shown below.- aro-vnet – the name of virtual network
- master-subnet – the name of master subnet
- worker subnet – the name of worker subnet
- ./pull-secret.txt – the path and pull secret where is located
- aro.ocpdemo.online – custom domain for the cluster
az aro create \
--resource-group $RESOURCEGROUP \
--name $CLUSTER \
--vnet aro-vnet \
--master-subnet master-subnet \
--worker-subnet worker-subnet \
--pull-secret @./pull-secret.txt \
--domain aro.ocpdemo.online
The information from the JSON output of the above command can be useful if you are not familiar with OpenShift 4. You can find your API server IP, API URL, OpenShift console URL and ingress IP. You will need the API, and ingress IP for the next step.
{- Finished ..
"apiserverProfile": {
"ip": "x.x.x.x",
"url": "https://api.aro.ocpdemo.online:6443/",
"visibility": "Public"
...
},
"consoleProfile": {
"url": "https://console-openshift-console.apps.aro.ocpdemo.online/"
},
....
"ingressProfiles": [
{
"ip": "x.x.x.x",
"name": "default",
"visibility": "Public"
}
....
Post ARO Installation
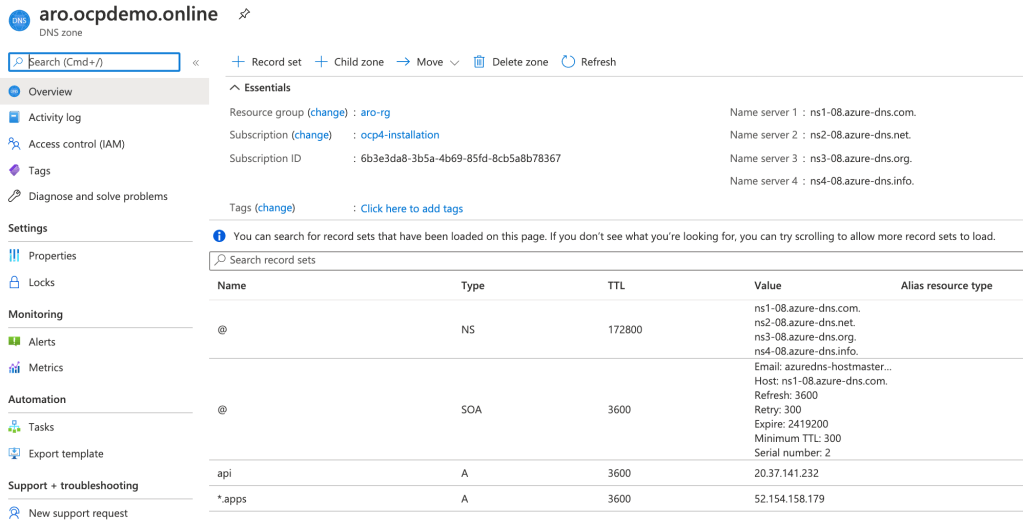
Adding two A records for api and *.apps in the DNS zone
- Login to Azure portal
- Go to DNS zone
- Click onto the domain for the ARO cluster
- Click “+ Record Set” on the top menu to create an A record and add values to Name and IP. You will need to repeat this step for both api and *.apps A records.
- Name: api or *.apps
- IP: the *.apps/ingress IP is from the output of the creation of the ARO
- The below screenshot shows the DNS zone configuration and adding 2 A records.
Test ARO Cluster
Getting Kubeadmin credential
az aro list-credentials \
--name $CLUSTER \
--resource-group $RESOURCEGROUP
The command will return the kubeadmin credential.
Log in OpenShift Console
Open a browser and go to the OpenShift console or look for “consoleProfile” from the JSON output from ARO creationhttps://console-openshift-console.apps.<DNS domain>/The login user is kubeadmin and the password is the credential from the last command. Congrats!! The ARO installation is completed!
Azure Active Directory Integration
Getting oauthCallBackURL
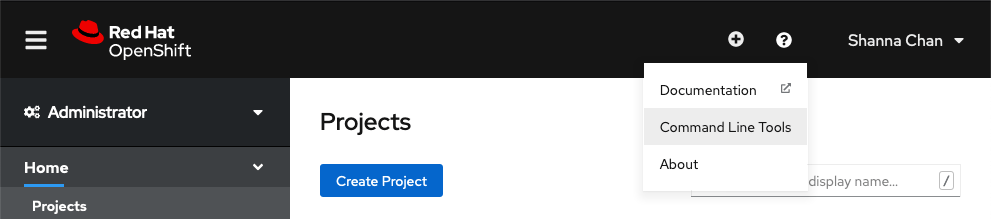
- Download OpenShift command line tool from console.
- Login to ARO via OC CLI
$ oc login -u kubeadmin -p <password> https://api.<DNS domain>:6443/

$ oauthCallBack=`oc get route oauth-openshift -n openshift-authentication -o jsonpath='{.spec.host}'`

$ oauthCallBackURL=https://$oauthCallBack/oauth2callback/AAD
Note: AAD is the name of the identity provider when configuring OAuth on OpenShift
Creating Application on Azure Active Directory
az ad app create \
  --query appId -o tsv \
  --display-name poc-aro-auth \
  --reply-urls $oauthCallBackURL \
  --password '<ClientSecret>'
Note: Please note that the above command returns the registered Application Id (AppId) which you will need it when configuring the OAuth on OpenShift.
Get tenant Id
az account show --query tenantId -o tsvNote: Please note that you will need the tenant Id for the OAuth configuration on OpenShift
Create manifest file
cat > manifest.json<< EOF
[{
"name": "upn",
"source": null,
"essential": false,
"additionalProperties": []
},
{
"name": "email",
"source": null,
"essential": false,
"additionalProperties": []
}]
EOF
Update the Azure Active Directory with a manifest
az ad app update \
--set optionalClaims.idToken=@manifest.json \
--id <AppId>
Update Application permission scope
az ad app permission add \
--api 00000002-0000-0000-c000-000000000000 \
--api-permissions 311a71cc-e848-46a1-bdf8-97ff7156d8e6=Scope \
--id <AppId>
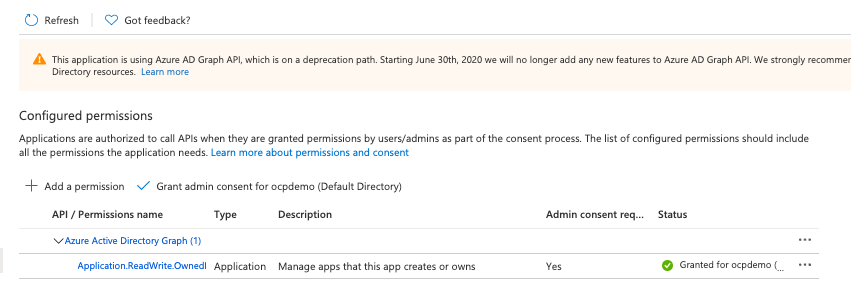
Grant admin consent
- login Azure portal
- Go to Azure Active Directory
- Click App Registrations
- Click “All Application” and search for newly create application name
- Click onto the display name of the application
- Click view API permissions
- Click on the “check” to grant admin consent for directory

Add service principal
$ az ad sp create-for-rbac --role Contributor --name poc-aro-spYou will need the “appId” from the output of the above command and that is the appId for the service principal
$az role assignment create --role "User Access Administrator" \
--assignee-object-id $(az ad sp list --filter "appId eq '<service-principal-appid>'" \
| jq '.[0].objectId' -r)
$az ad app permission add --id <appId> \
--api 00000002-0000-0000-c000-000000000000 \
--api-permissions 824c81eb-e3f8-4ee6-8f6d-de7f50d565b7=Role
This will output the follow command as shown below.
$az ad app permission grant --id <appid> --api 00000002-0000-0000-c000-000000000000I also grant the admin consent for the API permission for the service principal.
Create secret for identity provider on OpenShift
oc create secret generic openid-client-secret-azuread \
--namespace openshift-config \
--from-literal=clientSecret=<your password>
Create YAML for identity provider for AAD
apiVersion: config.openshift.io/v1
kind: OAuth
metadata:
  name: cluster
spec:
  identityProviders:
  - name: AAD
    mappingMethod: claim
    type: OpenID
    openID:
      clientID: xxxxxxxx-xxxx-xxxx-xxxx-xxxxxxxxxxxx
      clientSecret:
        name: openid-client-secret-azuread
      extraScopes:
      - email
      - profile
      extraAuthorizeParameters:
        include_granted_scopes: "true"
      claims:
        preferredUsername:
        - email
        - upn
        name:
        - name
        email:
        - email
issuer: https://login.microsoftonline.com/xxxxxxxx-xxxx-xxxx-xxxx-xxxxxxxxxxxx- The clientID is the AppId of your registered application.
- Issuer URL is https://login.microsoftonline.com/<tenant id>.
- The clientSecret is using the secret (openid-client-secret-azuread) that you created from the previous step.
- Login Azure Portal
- Click Home
- Click Azure Active Directory
- Click App registrations on the left menu
- Click all applications tab
- Type the application that you just created in the search area
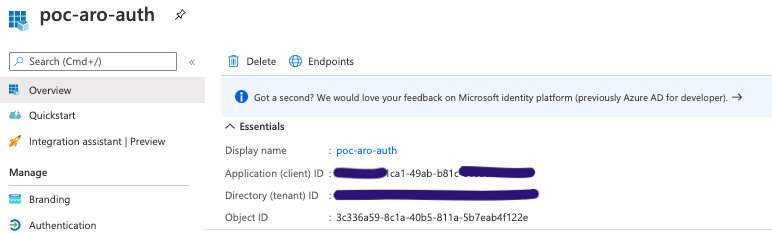
- Click onto the application (my application is poc-aro-auth)
- Under Overview, the information is shown as “Application (client) ID” and Directory (tenant) ID” as in the image below.
Update OpenShift OAuth Configuration
oc apply -f openid.yaml
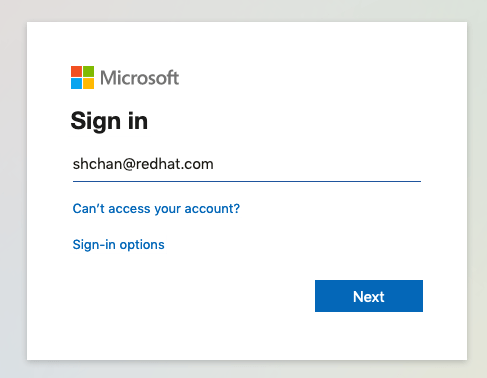
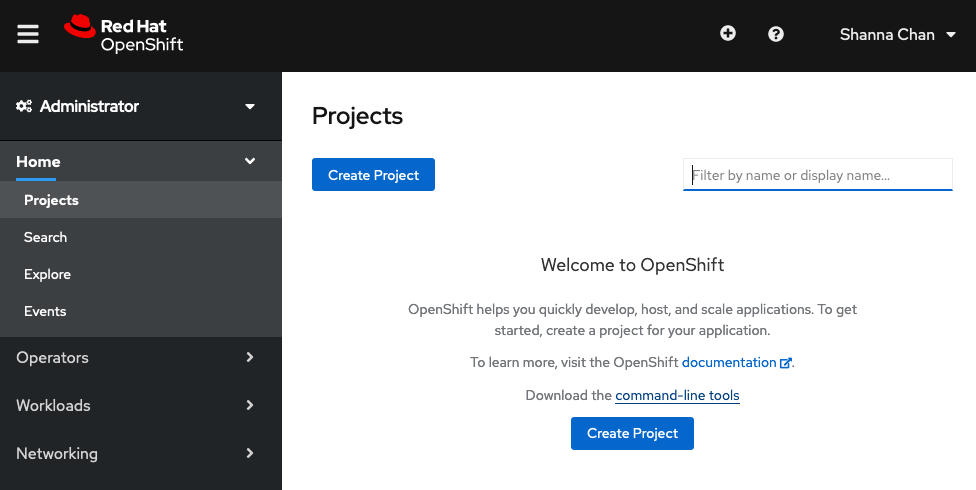
Login OpenShift console via AAD
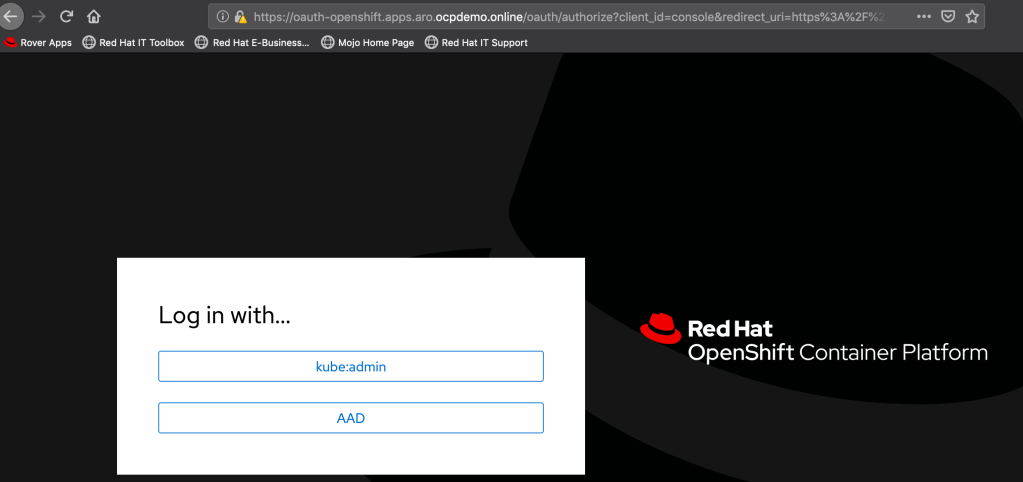

2 thoughts on “Azure Red Hat OpenShift 4 (ARO 4) integrate with Azure Active Directory”